
There’s something magical about the process of bakinga blend of science and art that culminates in moments of sweet satisfaction.
Among the myriad of desserts, Chocolate Lava Cake holds a special place.
Whether it’s for birthdays, romantic evenings, or simply a treat-yourself day, this dessert is a perfect crowd-pleaser.
A Sweet Memory to Cherish
I remember the first time I made a chocolate lava cake. It was a rainy Sunday, and the house smelled of melted chocolate and vanilla.
When I took that first bite, the molten center oozed out like liquid gold, pairing beautifully with a scoop of vanilla ice cream. It was a dessert so simple yet so elegant—it quickly became a staple for special occasions.

What Makes This Cake Unique
Unlike traditional cakes, chocolate lava cake combines the richness of a brownie with the gooey center of a soufflé. This recipe is surprisingly easy, with a short ingredient list and minimal prep time.
You’ll be amazed at how effortlessly you can create something that feels like it’s straight from a fancy restaurant.

Ingredients You’ll Need
Unsalted Butter: ½ cup (1 stick), plus extra for greasing
Semisweet Chocolate: 6 ounces, chopped
Granulated Sugar: ½ cup
Large Eggs: 2 whole eggs + 2 egg yolks
All-Purpose Flour: ¼ cup
Vanilla Extract: 1 teaspoon
Salt: A pinch

How to Make Chocolate Lava Cake
Preheat Your Oven Begin by preheating your oven to 425°F (220°C). This ensures the cakes bake evenly and develop that signature gooey center. Grease four 6-ounce ramekins with butter and lightly dust them with flour to prevent sticking.
Melt the Chocolate and Butter In a microwave-safe bowl, combine the chopped chocolate and butter. Microwave in 20-second intervals, stirring after each interval, until the mixture is smooth and fully melted. Set it aside to cool slightly.
Prepare the Batter In a separate mixing bowl, whisk together the sugar, eggs, and egg yolks until the mixture is pale and frothy. This step incorporates air, giving the cakes a light texture.
Combine Wet and Dry Ingredients Gradually pour the melted chocolate mixture into the egg mixture, whisking constantly to prevent the eggs from cooking. Add the vanilla extract and a pinch of salt. Sift the flour into the batter and gently fold it in until no lumps remain.
Fill the Ramekins Divide the batter evenly among the prepared ramekins, filling each about three-quarters full. For an extra touch, you can press a small square of chocolate into the center of each ramekin for an even gooier middle.
Bake to Perfection Place the ramekins on a baking tray and bake for 12–14 minutes. The edges should be set, but the centers will still appear slightly jiggly. Be careful not to overbake—this will compromise the molten center.
Cool and Serve Remove the ramekins from the oven and let them cool for 1–2 minutes. Gently run a knife around the edges to loosen the cakes, then invert each onto a serving plate. Serve immediately for the best molten effect.

Chocolate Lava Cake Frosting Tips
While chocolate lava cake is indulgent on its own, you can add a touch of flair with whipped cream or chocolate ganache drizzled over the top. If you prefer fruity flavors, a raspberry coulis pairs beautifully with the richness of the cake.
Decoration Ideas
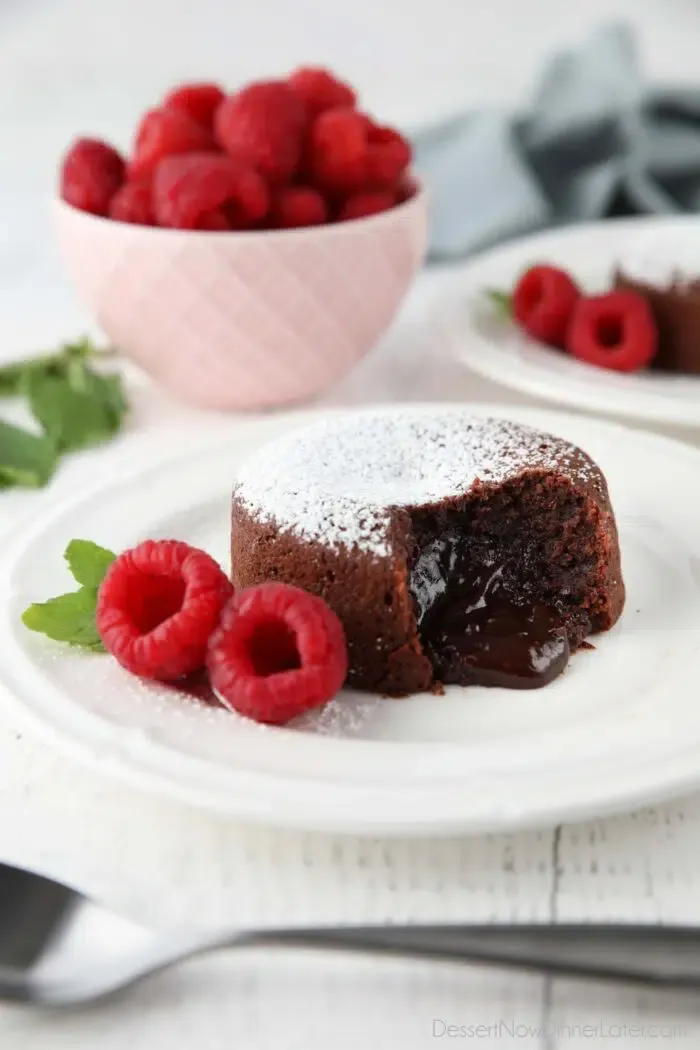
Dusting of Powdered Sugar: A light sprinkle of powdered sugar adds a touch of elegance.
Fresh Fruit Garnish: Top with fresh raspberries, strawberries, or a mint sprig for a pop of color and flavor.
Drizzle of Chocolate or Caramel Sauce: Enhance the richness with a drizzle of warm sauce.
Ice Cream Pairing: Add a scoop of vanilla or salted caramel ice cream on the side for a delightful contrast.

Pitfalls and How to AvoidThem
Watch the Bake Time: The secret to a perfect lava cake lies in the timing. Overbaking will result in a fully cooked center, while underbaking might make it difficult to release from the ramekin.
Prep Ahead: You can prepare the batter ahead of time and refrigerate it for up to 24 hours. Bring it to room temperature before baking.
Non-Stick Ramekins: Greasing and flouring the ramekins thoroughly is essential to ensure the cakes release easily.
Storage And Serving Ideas
Storage Tips: If you have leftovers (unlikely!), refrigerate them in an airtight container. Reheat briefly in the microwave for a molten center.
Perfect Pairings: Lava cakes pair wonderfully with espresso, red wine, or a hot cup of tea. The bitterness of coffee or the tannins in wine beautifully balance the richness of the chocolate.
FAQs
Q: Can I make this recipe without ramekins? A: Yes! You can use muffin tins instead. Just adjust the baking time to 8–10 minutes since muffin tins are smaller.
Q: What type of chocolate works best? A: High-quality semisweet or bittersweet chocolate is ideal. Avoid chocolate chips, as they often contain stabilizers that affect melting.
Q: Can I freeze the batter? A: Absolutely. Freeze the batter in the ramekins, then bake directly from frozen. Add 1–2 minutes to the bake time.
Q: How do I know when the cakes are done? A: The edges should be firm, and the center slightly wobbly. A toothpick inserted 1 inch from the edge should come out clean, while the center remains molten.
Q: Can I make this recipe gluten-free? A: Yes, substitute the all-purpose flour with almond flour or a 1:1 gluten-free baking mix.
Happy baking!
Join Our Nest! Get Exclusive Tips and Freebies
Unlock a world of creativity, inspiration, and practical advice with LadiesNest.
Join Our Nest! Get Exclusive Tips and Freebies
Categories
Solutions
Discover budget meal plans and delicious dessert recipes to eat well while saving time and money effortlessly.
Learn how to start and grow a successful small business.


