
There’s something incredibly satisfying about a slice of pie, especially when it’s homemade.
The perfect pie balances flavors and textures, offering comfort and indulgence all in one bite.

Among the many pies to choose from, few are as refreshing and unique as Key Lime Pie.
With its zesty lime flavor and creamy filling, this pie is the ideal combination of sweet and tart, and it evokes feelings of summer in every bite.
My Key Lime Pie Memory
I still remember the first time I tasted Key Lime Pie. I was on a family vacation in Florida, and after a long day of exploring, we stopped at a quaint little café near the beach.
There, I ordered my first slice of Key Lime Pie, and I was hooked instantly. The bright, tangy flavor of the lime, the rich creaminess of the filling, and the buttery graham cracker crust left a lasting impression.
Since that day, Key Lime Pie has been my go-to dessert whenever I need something refreshing and indulgent.

Why You’ll Love This Recipe
In this post, you’ll learn how to make the perfect Key Lime Pie that will transport you to the sunny shores of Florida.
Whether you’re a beginner or an experienced baker, this recipe is simple, delicious, and only requires a few key ingredients.
We’ll go through each step in detail to ensure your pie comes out tangy, creamy, and with a perfectly crisp crust.
This recipe is great for summer gatherings, special occasions, or just when you’re craving something a little tropical!
Ingredients You’ll Need
Key Lime Juice (½ cup)
Sweetened Condensed Milk (1 can, 14 oz)
Egg Yolks (4 large)
Graham Cracker Crust (1 pre-made or homemade)
Butter (6 tablespoons, melted)
Whipped Cream (for topping, optional)
Lime Zest (for garnish, optional)


How to Make Key Lime Pie
Step 1: Preheat and Prepare the Crust Preheat your oven to 350°F (175°C). If you’re making a homemade graham cracker crust, combine 1½ cups of graham cracker crumbs with 6 tablespoons of melted butter and ¼ cup of sugar in a medium bowl. Press the mixture into the bottom and up the sides of a 9-inch pie dish. Bake the crust for 8-10 minutes until lightly golden and set, then remove it from the oven and let it cool while you prepare the filling.
Step 2: Make the Key Lime Filling In a large bowl, whisk together the egg yolks until smooth. Gradually add the sweetened condensed milk, whisking until the mixture is fully combined and creamy. Finally, stir in the Key lime juice and continue whisking until everything is well mixed. The lime juice will naturally thicken the mixture, creating a smooth, custard-like filling.
Step 3: Fill the Pie Crust Once your crust has cooled, pour the Key lime filling into the crust, smoothing the top with a spatula to create an even layer.
Step 4: Bake the Pie Place the pie in the preheated oven and bake for 15-18 minutes, or until the filling is set but still slightly jiggly in the center. Be careful not to overbake—the pie will continue to firm up as it cools.
Step 5: Cool and Chill Remove the pie from the oven and let it cool on a wire rack to room temperature. Once cooled, transfer the pie to the refrigerator and chill for at least 3 hours, or until fully set. Chilling the pie is crucial for achieving the perfect texture.
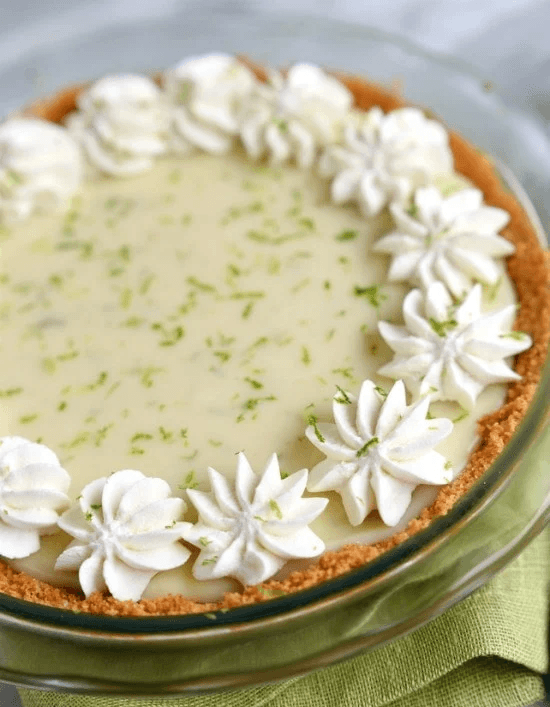
Step 6: Garnish and Serve Before serving, top the pie with freshly whipped cream and a sprinkle of lime zest for a bright, fresh finish. Slice, serve, and enjoy the refreshing taste of this classic Key Lime Pie!

Can I use regular limes instead of Key limes?
If you can’t find Key limes, regular limes will work as a substitute. The flavor will be slightly less intense, but the pie will still be delicious. You can also try a mix of both for a more complex flavor.
How do I know when the pie is done baking?
The filling should be set but still have a slight jiggle in the center when you take it out of the oven. It will continue to firm up as it cools and chills in the refrigerator.
Can I make the pie ahead of time?
Absolutely! Key Lime Pie can be made a day in advance. Just keep it covered and refrigerated until you’re ready to serve.
How long will Key Lime Pie last in the refrigerator?
The pie will stay fresh for up to 3 days when stored in the refrigerator. Just make sure to cover it tightly with plastic wrap or aluminum foil to keep it from drying out.
Can I freeze Key Lime Pie?
Yes, you can freeze Key Lime Pie. Wrap it tightly in plastic wrap and then in aluminum foil before freezing. It will keep in the freezer for up to 2 months. To serve, let it thaw in the refrigerator for several hours or overnight.
Customizing Key Lime Pie to Your Taste
Coconut Key Lime Pie For a tropical twist, add ½ cup of shredded coconut to the graham cracker crust before baking. You can also sprinkle toasted coconut flakes on top of the whipped cream for an extra layer of flavor.
Key Lime Pie Bars Turn this pie into easy-to-eat bars by baking the filling in a square or rectangular dish and cutting it into squares after it sets. This is perfect for potlucks or picnics where you want something more portable.
Seasonal Variations
In the winter months, you can add a touch of warmth to the pie by incorporating a pinch of cinnamon or nutmeg into the crust. In the summer, fresh berries like raspberries or blackberries make a beautiful and tasty garnish to contrast the lime flavor.

Tips for the Best Key Lime Pie
Overmixing the Filling: When combining the lime juice with the sweetened condensed milk and egg yolks, be careful not to overmix. Stir just until combined. Overmixing can lead to a filling that doesn’t set properly.
Using Too Much Lime Juice: While lime juice is the star of this pie, using too much can make the filling overly tart. Stick to the recommended amount for a balanced flavor.
Skipping the Chill Time: It’s tempting to serve the pie as soon as it’s cool, but chilling is key to getting the right texture. Make sure to let the pie chill for at least 3 hours before serving.
Refrigeration: Always store Key Lime Pie in the refrigerator, especially if it has whipped cream on top. It will keep for up to 3 days.
Freezing: If you plan to freeze the pie, do so without the whipped cream topping. Add the whipped cream fresh after thawing. Freeze the pie tightly wrapped to avoid freezer burn and thaw in the fridge before serving.
Happy baking!
Join Our Nest! Get Exclusive Tips and Freebies
Unlock a world of creativity, inspiration, and practical advice with LadiesNest.
Join Our Nest! Get Exclusive Tips and Freebies
Categories
Solutions
Discover budget meal plans and delicious dessert recipes to eat well while saving time and money effortlessly.
Learn how to start and grow a successful small business.


